How To Replace the Backup Battery in Your LiftMaster Operator
[Last Updated:] December 20, 2024
Have you ever gotten home after a long day, reached up to press the button on your garage door remote or garage door app, and nothing happened? While it might just seem like a minor frustration, not knowing what to do can put a real damper on your day.
The pros at Precision Garage Door Service® are here to show you how to replace a LiftMaster battery using easy-to-follow instructions. Regularly changing the battery before it goes dead can save you some frustration and be a reminder to take care of any other garage door maintenance you need to attend to.
Keep reading to learn how to change a battery on a garage door opener, a guide on replacing batteries in the remotes, and some signs that your battery is about to stop working.
Table of Contents:
- Step One - Call a Professional
- Step Two - Disconnect the Operator
- Step Three - Locate the Battery Compartment
- Step Four - Remove the Battery
- Step Five - Insert the New Battery
- Step Six - Reassemble and Test the Opener
- LiftMaster Garage Door Operator: Remote Battery Replacement
- Signs Your Battery Needs to Be Replaced
- Trust Precision Garage Door Service for Battery Replacement
- LiftMaster Battery FAQ
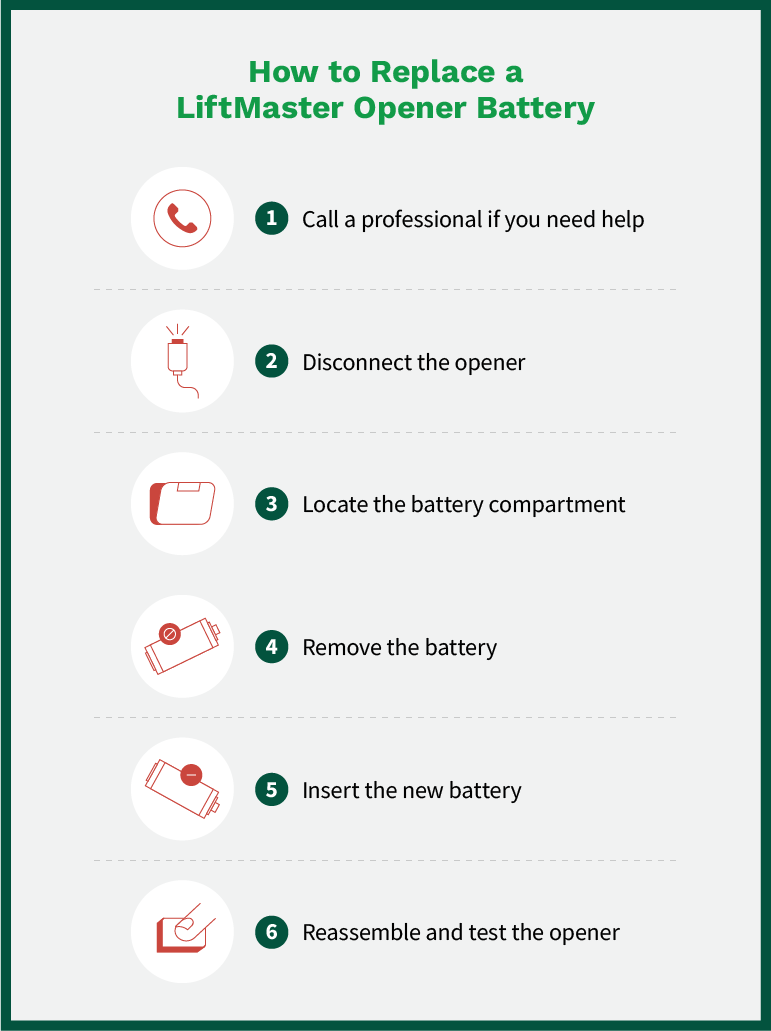
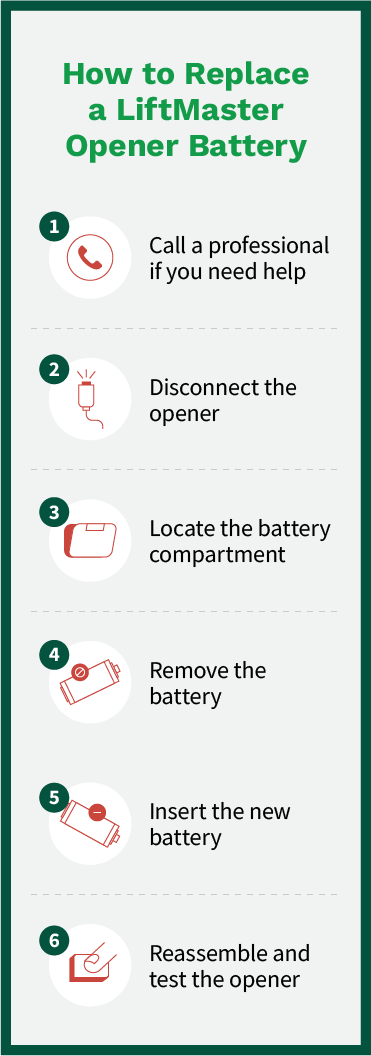
Step One - Call a Professional
If you’ve never completed a Liftmaster battery replacement before, it’s a good idea to call a professional, especially if you’re worried that your opener is broken.
A trained service professional can help:
- Avoid safety hazards: Garage door openers are connected directly to your home’s power supply. Even if the battery is weak or dead, the opener could still shock you. Some batteries can corrode and leak acid, which can cause injury. Garage door professionals are equipped to handle these safety hazards when repairing manual garage doors.
- Get peace of mind: Garage door operator batteries are specialty batteries you can’t just get anywhere. Trusting a professional means you won’t have to worry about buying the wrong one. You’ll also know that when it is replaced, it is done right.
- Keep your warranty valid: If you attempt a DIY replacement of your garage door opener battery, you could void the warranty. This is especially true if you accidentally damage the opener.
Step Two - Disconnect the Operator
Whether you are doing the work yourself or entrusting the job to a professional, you’ll need to disconnect the opener from the wall socket before you remove the battery.
But before you do that, it’s a good idea to:
- Check your wall control unit, as the lock/vacation button may have accidentally been pressed. If so, press it again to release the lock. Then try to open the garage again. If it functions, there is no need to change your battery.
- Determine what type of battery your opener uses by checking your user guide or doing an online search.
Doing these things can help keep you safe and save time.
To disconnect the opener, first find the cable running from the unit to a nearby electrical socket. The socket is likely located above the motor and out of the way of the garage door. Using a ladder, disconnect the plug from the socket.
Step Three - Locate the Battery Compartment
Most LiftMaster models have a battery compartment under the light cover. Trained service professionals will know how to remove the cover from a LiftMaster garage door opener.
Open the light cover and examine the battery cover to see which tools you need to open it. Some covers can be removed by manually pressing on a tab with your fingers. If you see slotted or Phillips head screws, you’ll need a screwdriver that will fit those screws.
Step Four - Remove the Battery
Once the battery cover is open, it’s time to remove the battery from your LiftMaster garage door operator. For some models, you may need to disconnect some snaps that attach to the terminals.
Other models may use metal or plastic connectors at the end of the wires that slide over thin metal terminals. If the connectors won’t come off of the terminals smoothly, grip the connector close to the terminal and gently rock it back and forth to loosen it.
With the battery disconnected, remove it from the opener. Check for any signs of acid leakage or damage to the opener.
Step Five - Insert the New Battery
If everything looks good, insert the new battery so that it sits inside the compartment the way the old one did and reconnect it, paying close attention to ensure that the wires go to the proper terminals. Attach the red wire to the positive terminal and the black wire to the negative terminal.
You can check that the battery is seated properly by placing the cover over the hole. If the cover doesn’t sit flush with the body of the opener, it means the battery may be oriented incorrectly. Carefully pull it back out and reinsert it until the cover aligns properly.
Step Six - Reassemble and Test the Operator
After putting in the new battery, replace the battery cover, close the light cover, and plug the unit back in. Then, press the button on the wall unit to test the door.
If it opens, try activating the door using the remotes. If the remotes don’t work, try to reprogram the remotes to reestablish the connection.
LiftMaster Garage Door Operator: Remote Battery Replacement
If you can’t open the garage with your remote but pressing the wall button opens the door, then you need to replace the remote battery.
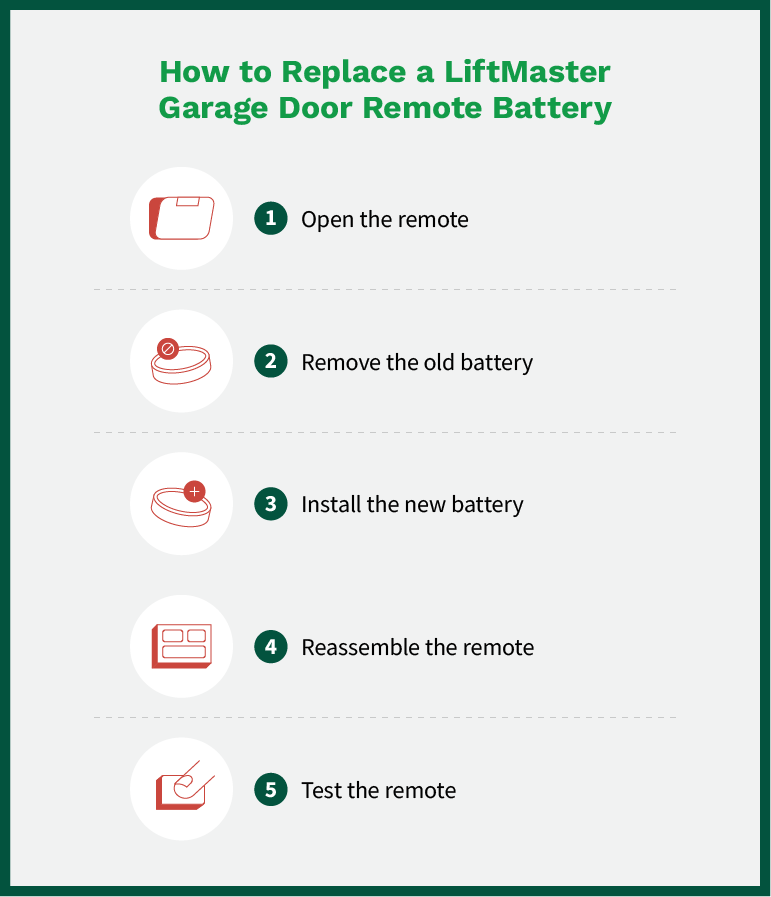
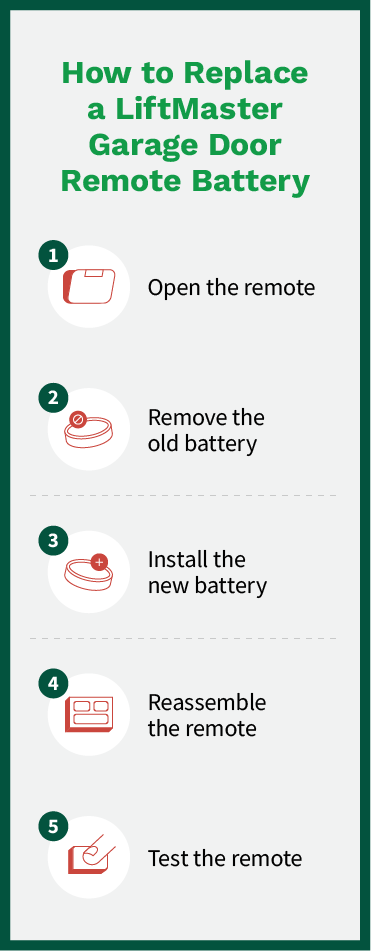
Swapping the battery in a remote control is much simpler than replacing the battery in the operator itself:
- Open the remote: Most units have a tab or screws that will let you open the remote. It should open into two halves.
- Remove the old battery: With the remote’s case open, you should see the battery. It should look like a flat silver circle. Using your fingers (not the screwdriver), work the battery out of the clips holding it to the interior components. Set it to the side, away from your new battery.
- Install the new battery: Pick up the new battery along its edges and press it gently but firmly into the clips inside the remote. It might not give an audible click, but it shouldn’t move or fall out if you turn the remote upside down. The positive side (marked with a + sign) should be visible when inserted.
- Reassemble the remote: With the battery securely replaced, place the halves of the remote back together.
- Test the remote: Once you’ve reassembled the remote, test it out. If it still isn’t working, open it back up and double-check that the battery is oriented correctly and seated fully.
Just replacing the remote battery shouldn’t require you to reprogram the remote.
Signs Your Battery Needs To Be Replaced
Most garage door operator batteries don’t go from functioning perfectly to not working. There are signs that it is time for a garage door battery replacement. Keep an eye out for:
- Beeping: The opener will beep several times when the garage door is opened or closed, and the battery is low.
- Slow operation: While some garage doors always open slowly, if you notice a significant slowdown in opening and closing, it could mean the battery is going bad.
- Erratic function: If your garage door opens by itself, opens or closes halfway, or is acting strangely, that’s a sign that you need to contact a garage door repair expert. It could mean a failing battery, a problem with a sensor, or motor damage.
- Remote range issues: Part of the garage door operator battery’s function is to receive a signal from the remote. If your garage door won’t close or open unless you are very close to the opener, it may mean that the battery is losing power.
If your door is stuck open or closed, you may need to use the emergency release. Be very careful — the door is heavy and can cause serious damage to anyone and anything in its path.
Trust Precision Garage Door Service for Battery Replacement
Knowing how to replace a LiftMaster battery is helpful for figuring out if that’s the source of your problem, but it might not be a good idea to attempt this repair on your own. A LiftMaster wall mount battery replacement is not always a simple task that you can do without assistance.
Our team of garage door service professionals can help. Find the Precision Garage Door Service service professionals nearest you to schedule an appointment for garage door repairs. All of our work is backed by the Neighborly Done Right Promise™ to ensure your satisfaction.
This article is intended for general informational purposes only and may not be applicable to every situation. You are responsible for determining the proper course of action for your property. Precision Garage Door Service is not responsible for any damages that occur as a result of this blog content or your actions. For the most accurate guidance, contact the Precision Garage Door Service location nearest you for a comprehensive, on-site assessment.
LiftMaster Battery FAQ
As a garage door service, repair, and installation leader renowned for integrity and dependability, all independently owned and operated Precision Garage Door Service locations are committed to your satisfaction. This commitment includes using our expertise and years of experience to answer your garage door-related questions.
Here are answers to some of the most frequently asked questions about how to replace a LiftMaster battery:
What kind of battery is in a LiftMaster garage door opener?
Many of the modern LiftMaster garage door openers use a 485LM battery. If you have an older or specialty unit, it may need something different. Check your user guide or contact a garage door opener expert.
How long does a LiftMaster battery last?
If properly maintained, most LiftMaster batteries last between one and two years.
How do I stop my LiftMaster battery from beeping?
To stop your LiftMaster garage opener from beeping, you’ll need to replace the battery.
Where can I purchase a replacement battery for my LiftMaster operator?
You can order a battery online, buy it from a specialty battery store, or hire garage door experts. Precision Garage Door Service will bring the right battery and replace it for you correctly.
Why is it important to have a battery backup in LiftMaster operators?
It’s important to have a battery backup in a LiftMaster garage door operator in case the power goes out. Without a backup, your garage door will not be functional until power returns.


